Deploying and Testing
Now that we've built our backend, let's deploy it to Keel and test it out.
Let’s commit and push these using our git client.
git commit -m "init" && git push origin mainThis will automatically trigger a build in the Keel console:
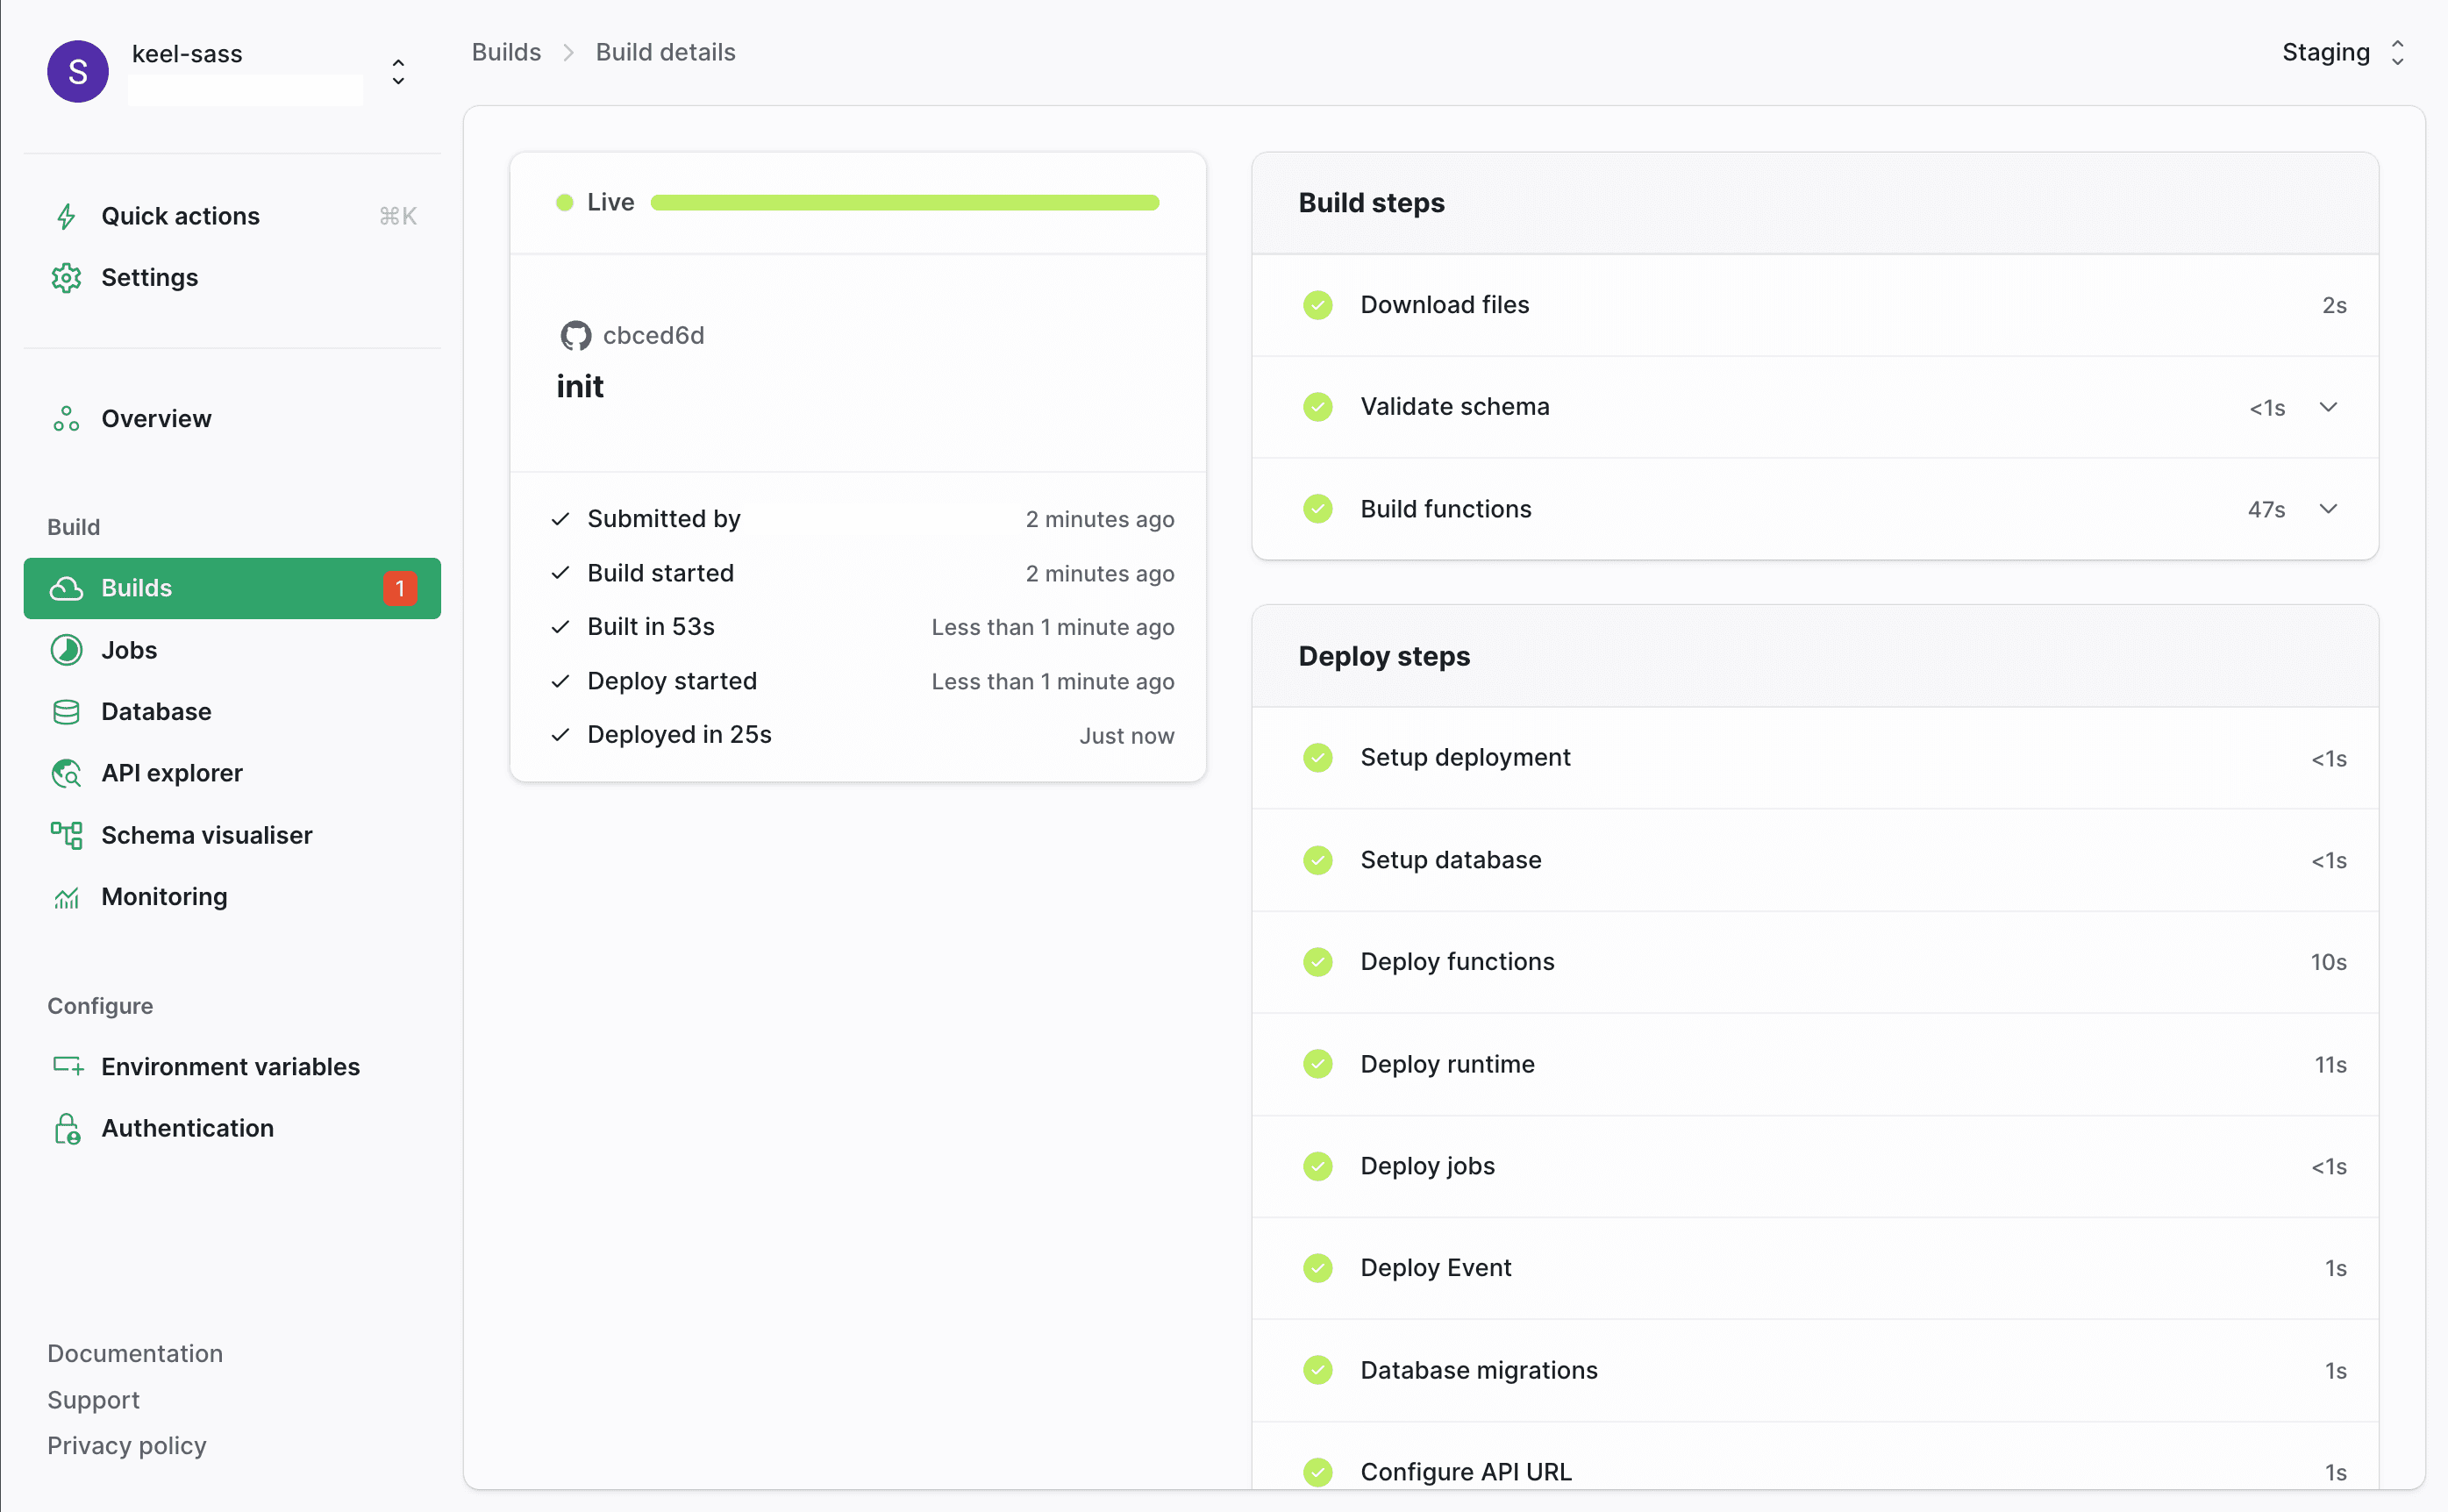
When the build is finished, head over to the built-in API explorer on the Keel console and test the APIs.
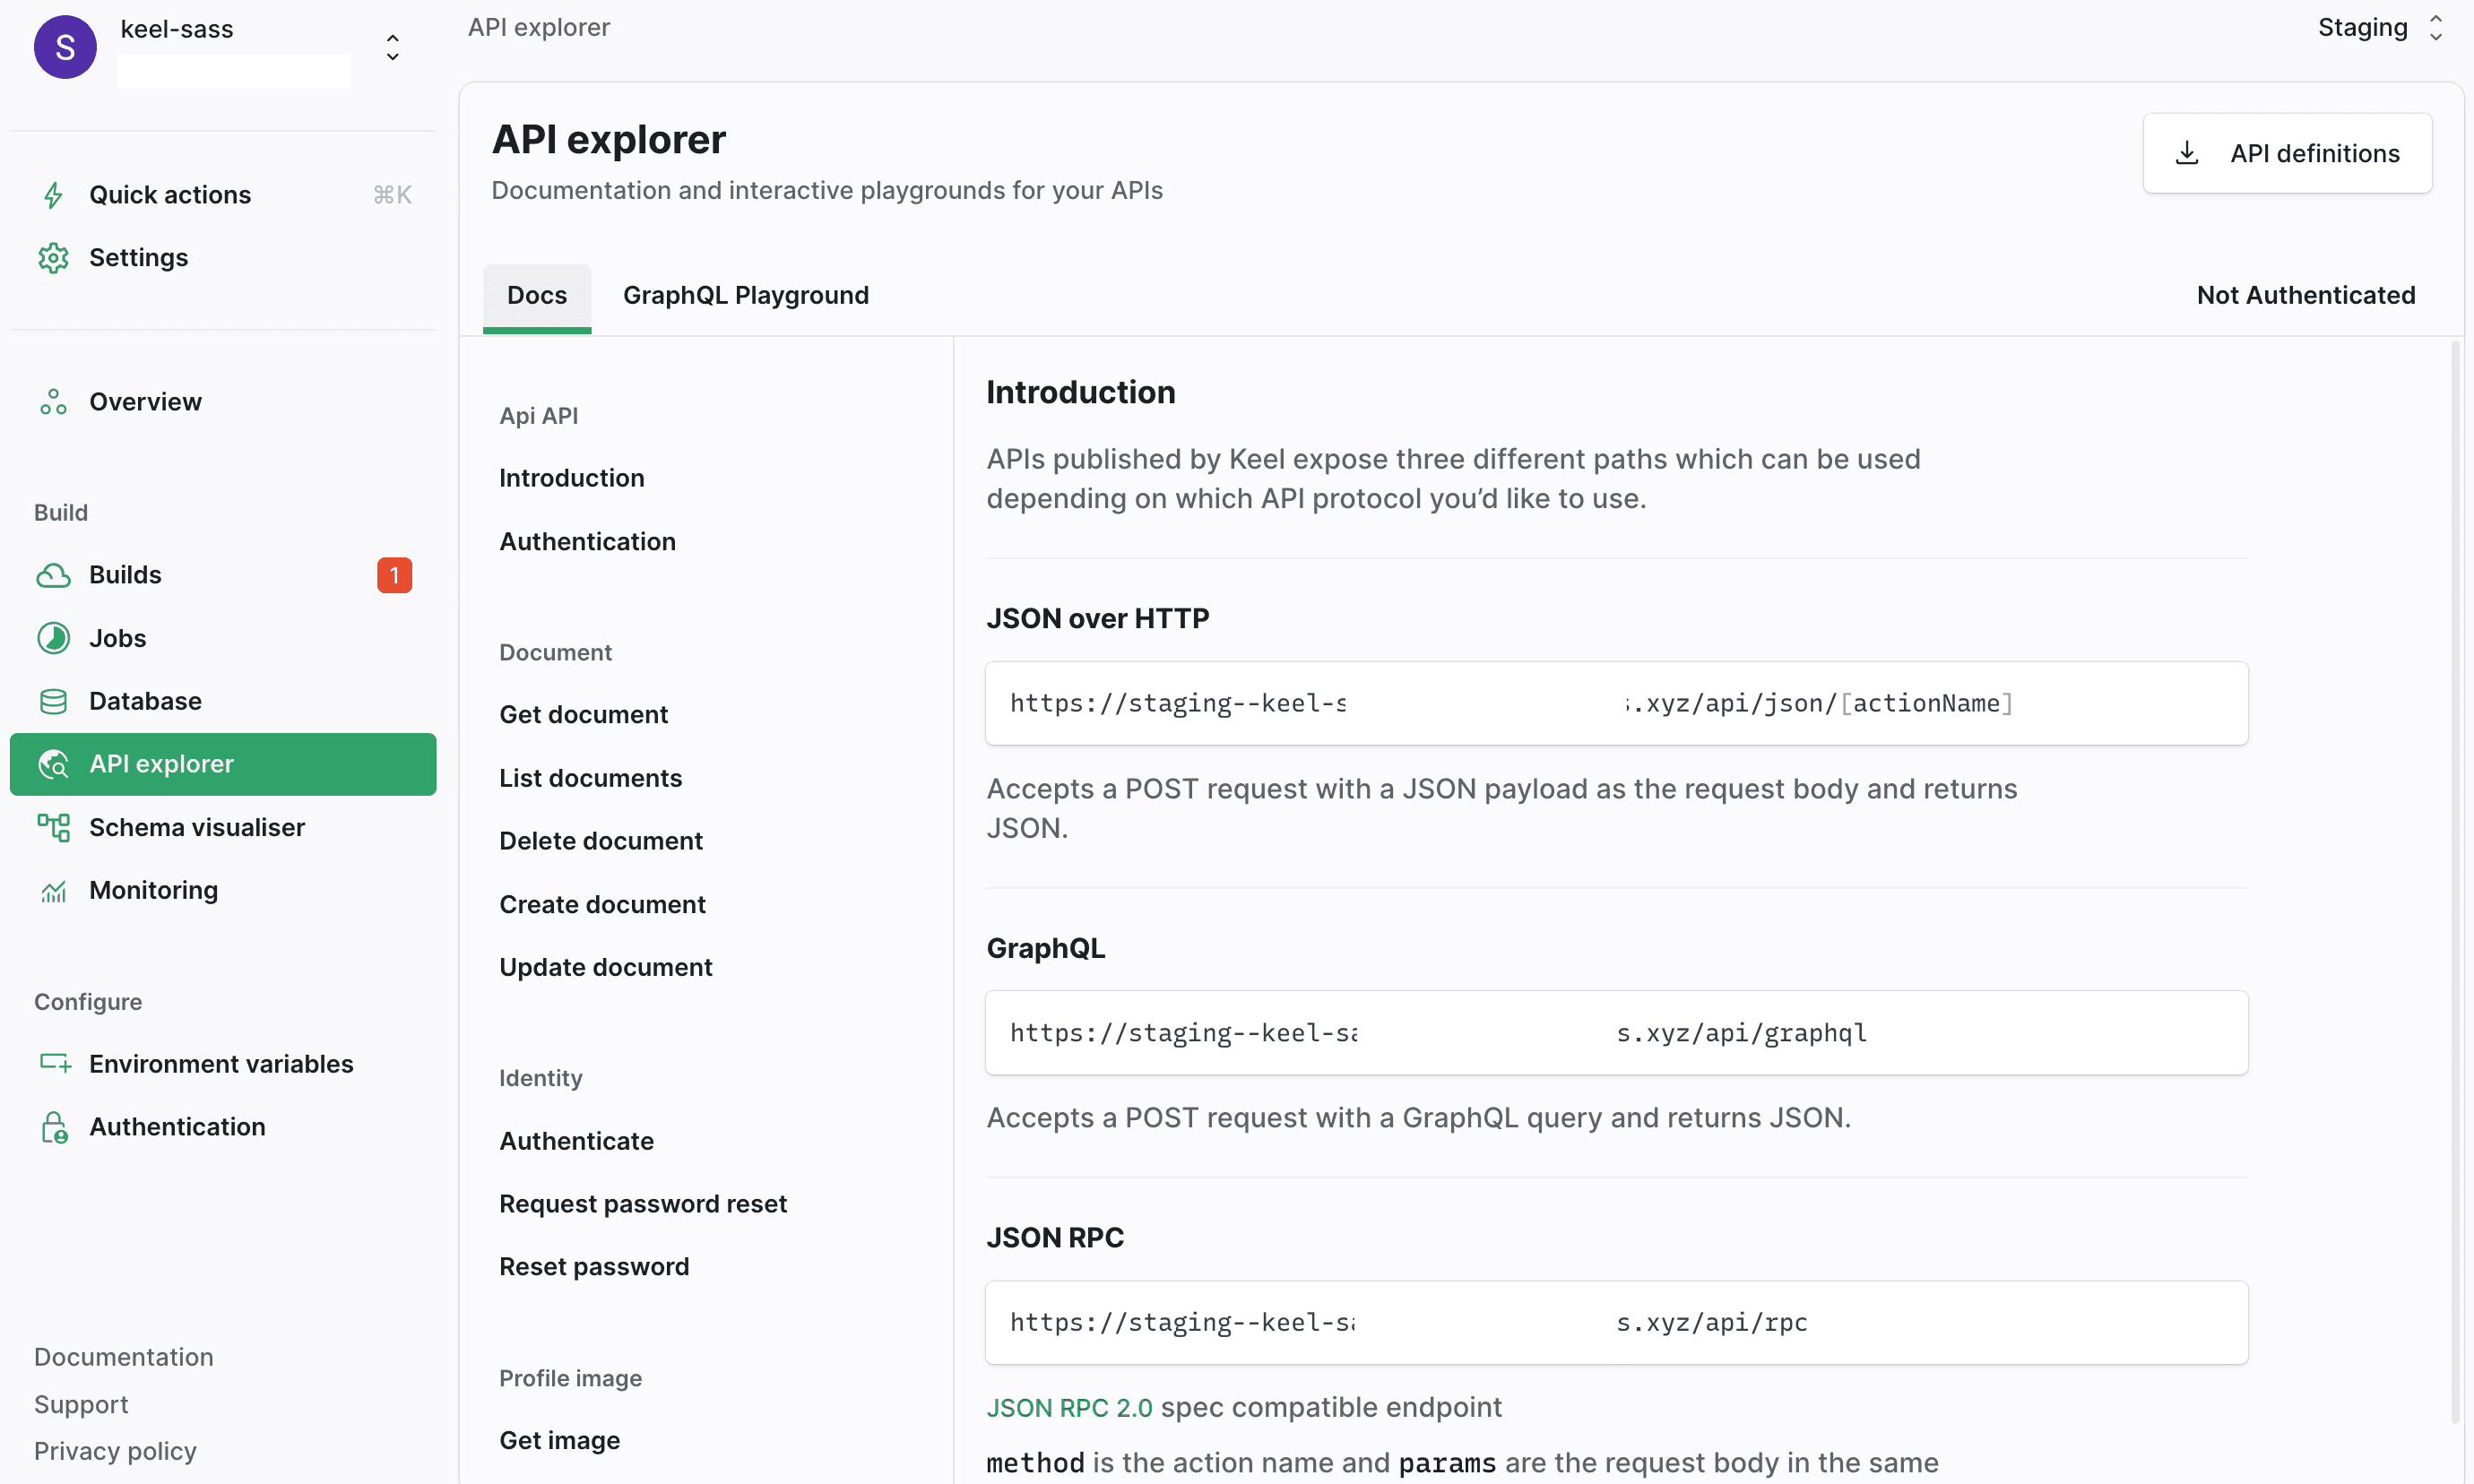
With the API explorer on the Keel console, you can interact with your API on the fly without needing to connect it to a UI. Here is how you can use the API explorer to test out the create new document endpoint:
Keel Console API explorer demo
In the above demo, we created a new document and tied it to an already existing user. After creating the document, we went to the database explorer in the Keel console to make sure our document was created and saved to the database.
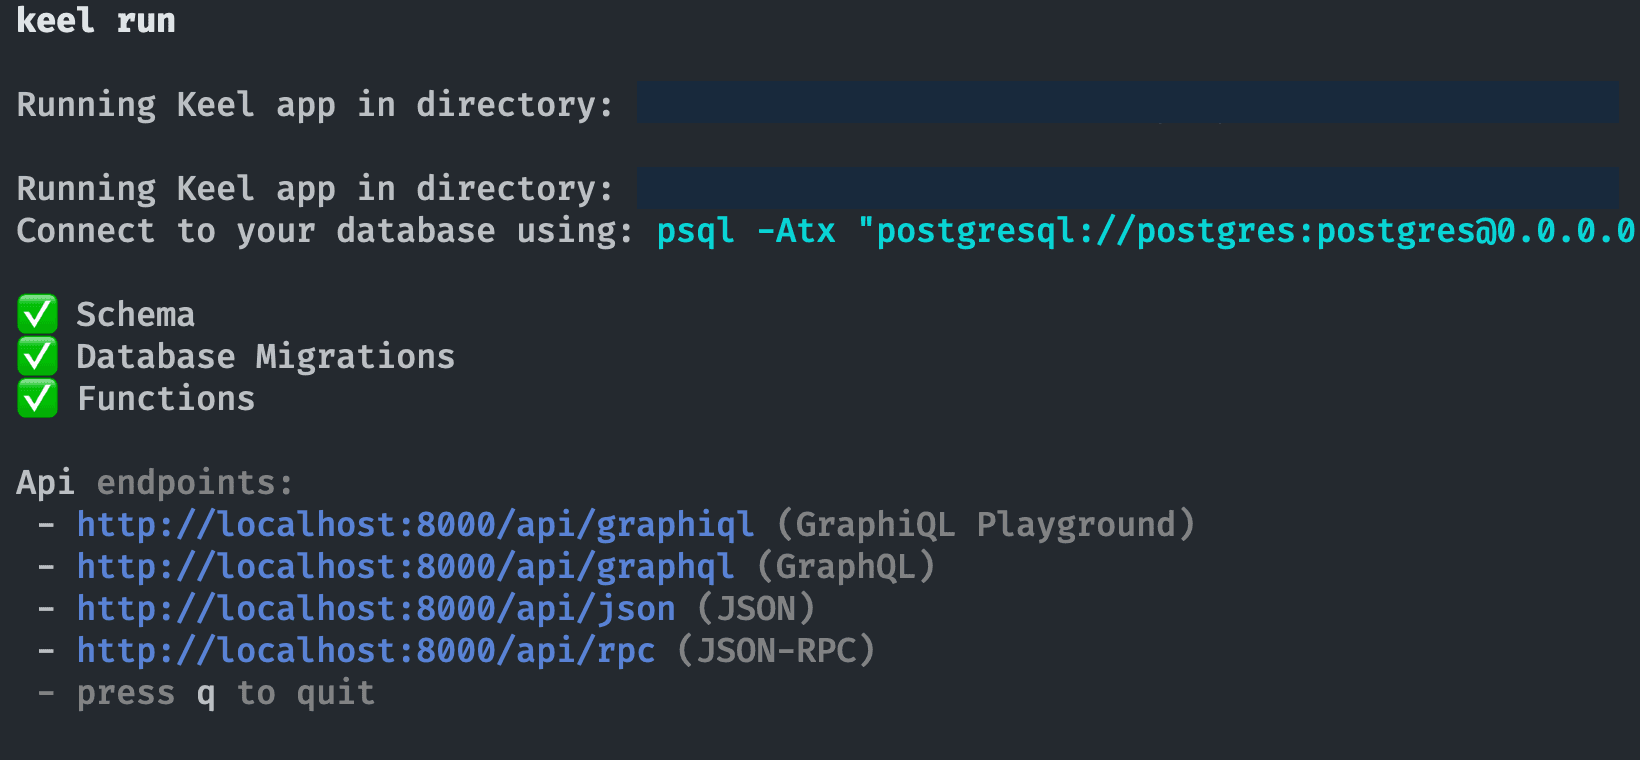
You can also interact with your API endpoint locally without the Keel console by running your Keel app using the following command:
keel runThis will automatically start a local server you can connect to and make API requests to test your endpoints either with a UI or a HTTP requests client like Postman.
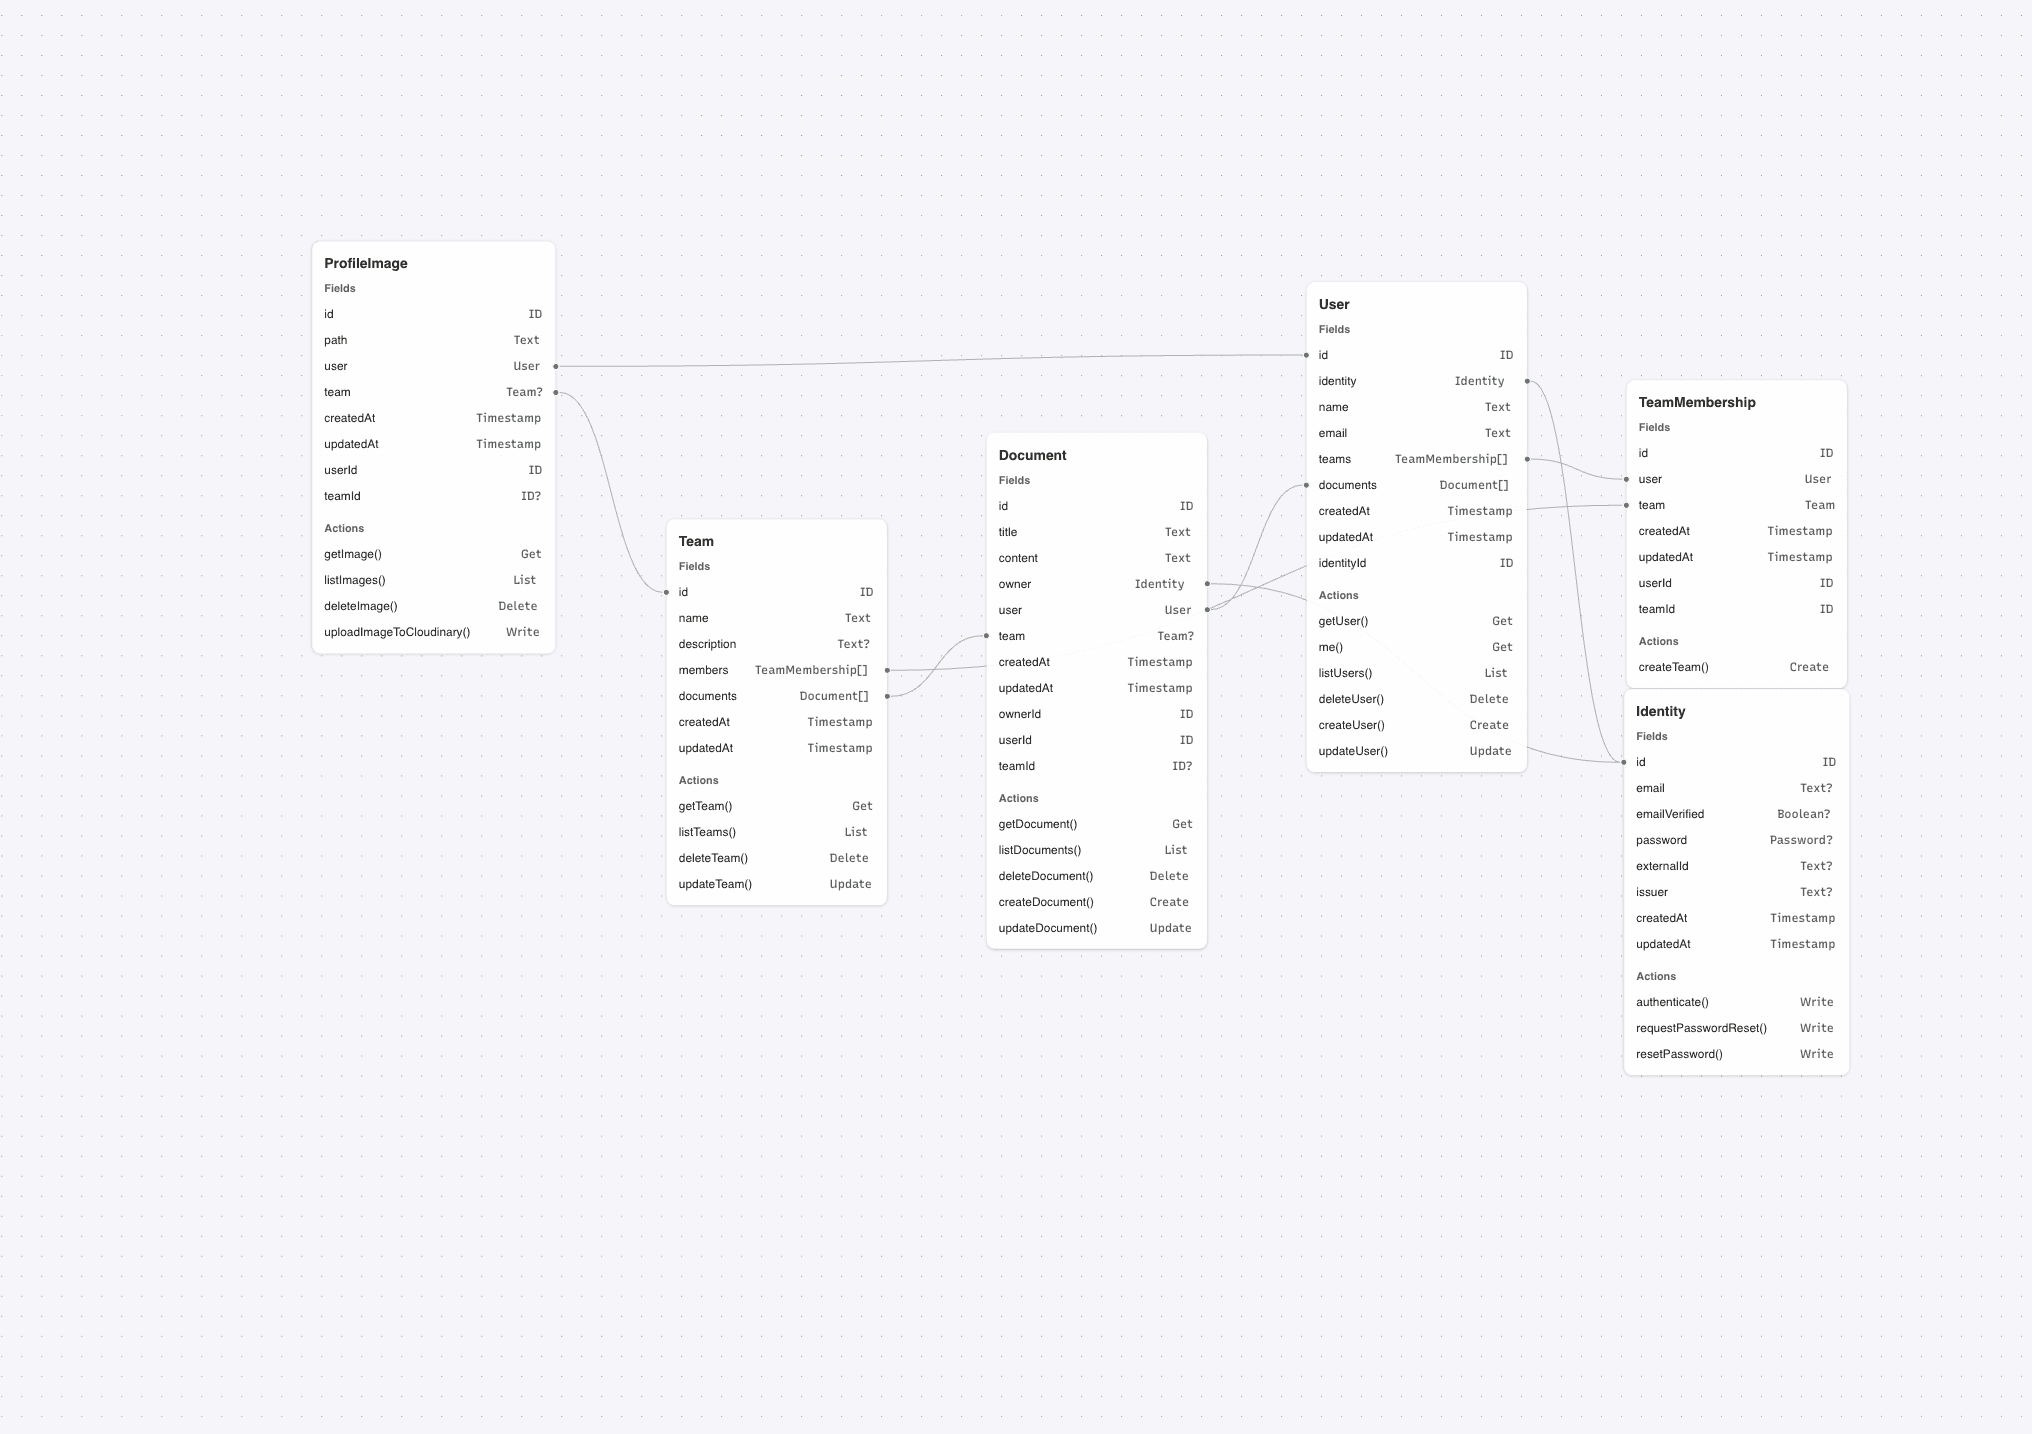
In the Keel console you can visualise your schema, If you click on “Schema visualiser” on the side bar of the Keel console, you should see your Keel schema presented to you. For our project, our schema should look similar to this:
Great Job! we have successfully built a backend of a SaaS application with Keel.