CLI
The Keel CLI is your primary tool for developing, testing, and deploying Keel applications. It handles everything from project initialization to local development, testing, and self-hosted deployments.
Installing Keel CLI
The Keel CLI can be installed from NPM:
npm install -g keelTo verify the installation and check your version:
keel --versionGlobal flags
These flags are available on all commands:
| Flag | Short | Description |
|---|---|---|
--dir | -d | Directory containing a Keel project (defaults to current directory) |
--version | -v | Print the Keel CLI version |
Commands overview
| Command | Description |
|---|---|
keel init | Initialize a new Keel project |
keel run | Start a local development server |
keel generate | Generate SDK and scaffold functions |
keel validate | Validate your schema and config |
keel format | Format your schema files |
keel test | Run your test suite |
keel client | Generate a TypeScript client SDK |
keel db | Manage your development database |
keel secrets | Manage local development secrets |
keel init
Initialize a new Keel project with an interactive setup wizard.
keel initThe init command guides you through:
- Directory — Choose where to create your project
- Template — Start with a blank project or a starter template
- Package Manager — Select npm or pnpm
- Version Control — Optionally initialize a Git repository
What gets created
For a blank project, keel init creates:
my-keel-app/
├── schema.keel        # Your Keel schema
├── keelconfig.yaml    # Project configuration
├── .gitignore         # Git ignore rules
├── package.json       # Node.js dependencies
└── node_modules/      # Installed packages
The command also runs keel generate automatically to create the @teamkeel/sdk and @teamkeel/testing packages.
Starter templates
When you select "Starter template", the CLI downloads templates from the teamkeel/starter-templates (opens in a new tab) repository and lets you choose from available options.
keel run
Start a local development server for your Keel project.
keel run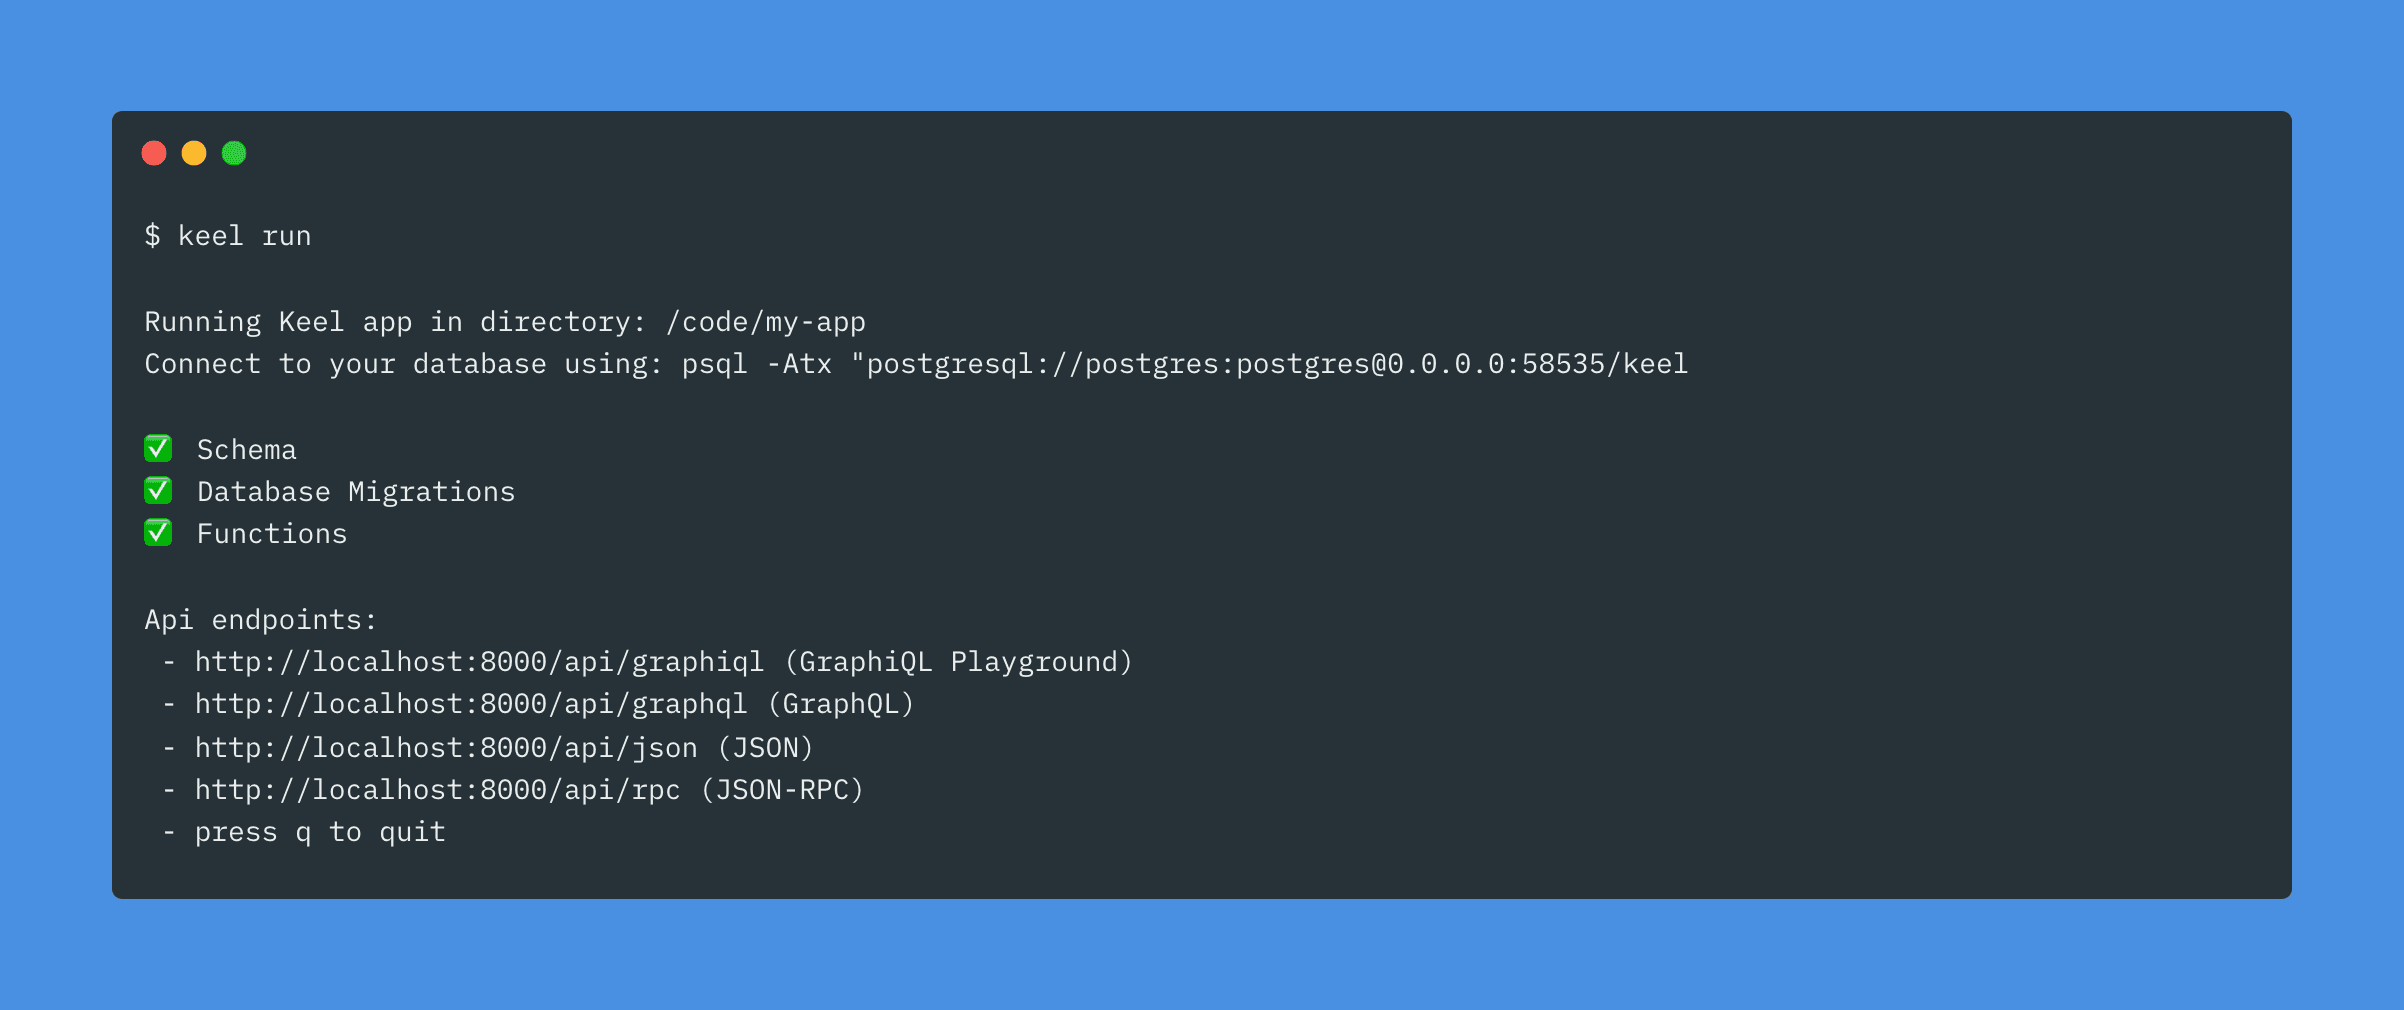
This command:
- Sets up a local PostgreSQL database using Docker
- Runs any pending database migrations
- Validates your schema
- Sets up your functions
- Starts a development server on port 8000
- Watches for changes to your schema and function files
Flags
| Flag | Description | Default |
|---|---|---|
--port | Port to run the development server on | 8000 |
--hostname | Custom hostname to handle HTTP requests | - |
--no-seed | Skip seeding a freshly created (empty) database after migrations | false |
--private-key-path | Path to a private key .pem file for JWT signing | - |
--database-url | PostgreSQL connection string to use instead of Docker | - |
Examples
Run on a different port:
keel run --port 3000When keel run creates a fresh, empty database, it seeds it automatically after applying migrations. To skip that, use --no-seed:
keel run --no-seedTo start from a clean database, reset it first with keel db reset, then run:
keel db reset
keel run
Use an external PostgreSQL database instead of Docker:
keel run --database-url postgresql://user:password@localhost:5432/mydbThis is useful if you prefer to manage your own PostgreSQL instance during local development or need to connect to a specific database setup.
GraphiQL playground
While the development server is running, you can access a GraphiQL playground at:
http://localhost:8000/api/graphiqlThis provides an interactive environment to explore and test your GraphQL API.
Streaming logs
While the development server is running, press l to open a live log view of what your app is doing. Press l again, q, or Esc to return to the normal view. Ctrl-C stops the server.
The view replays the activity it has already collected and then streams new events as they arrive. Requests, jobs, subscribers, flow runs and migrations each appear as a timestamped summary line, with that event's attributes indented underneath it:
14:32:07.114  POST /web/json/createPost → 200 (12ms) createPost · Post
              trace                  4bf92f3577b34da6a3ce929d0e0e4736
              api                    web
              protocol               JSON
              action.type            create
              permission             granted
              client.address         ::1
              user_agent.original    curl/8.7.1
Requests are not printed inline in the default keel run output. They appear in this log view instead.
Some attributes are hidden by default to keep those blocks readable. Use --verbose to reveal them:
keel run --verboseThe log view is plain scrolling output rather than a full-screen interface, so your terminal's own scrollback, selection and search work in it as they do anywhere else. It needs an interactive terminal, so it is not offered when the output of keel run is piped or redirected.
keel generate
Generate the @teamkeel/sdk package and scaffold missing function files.
keel generate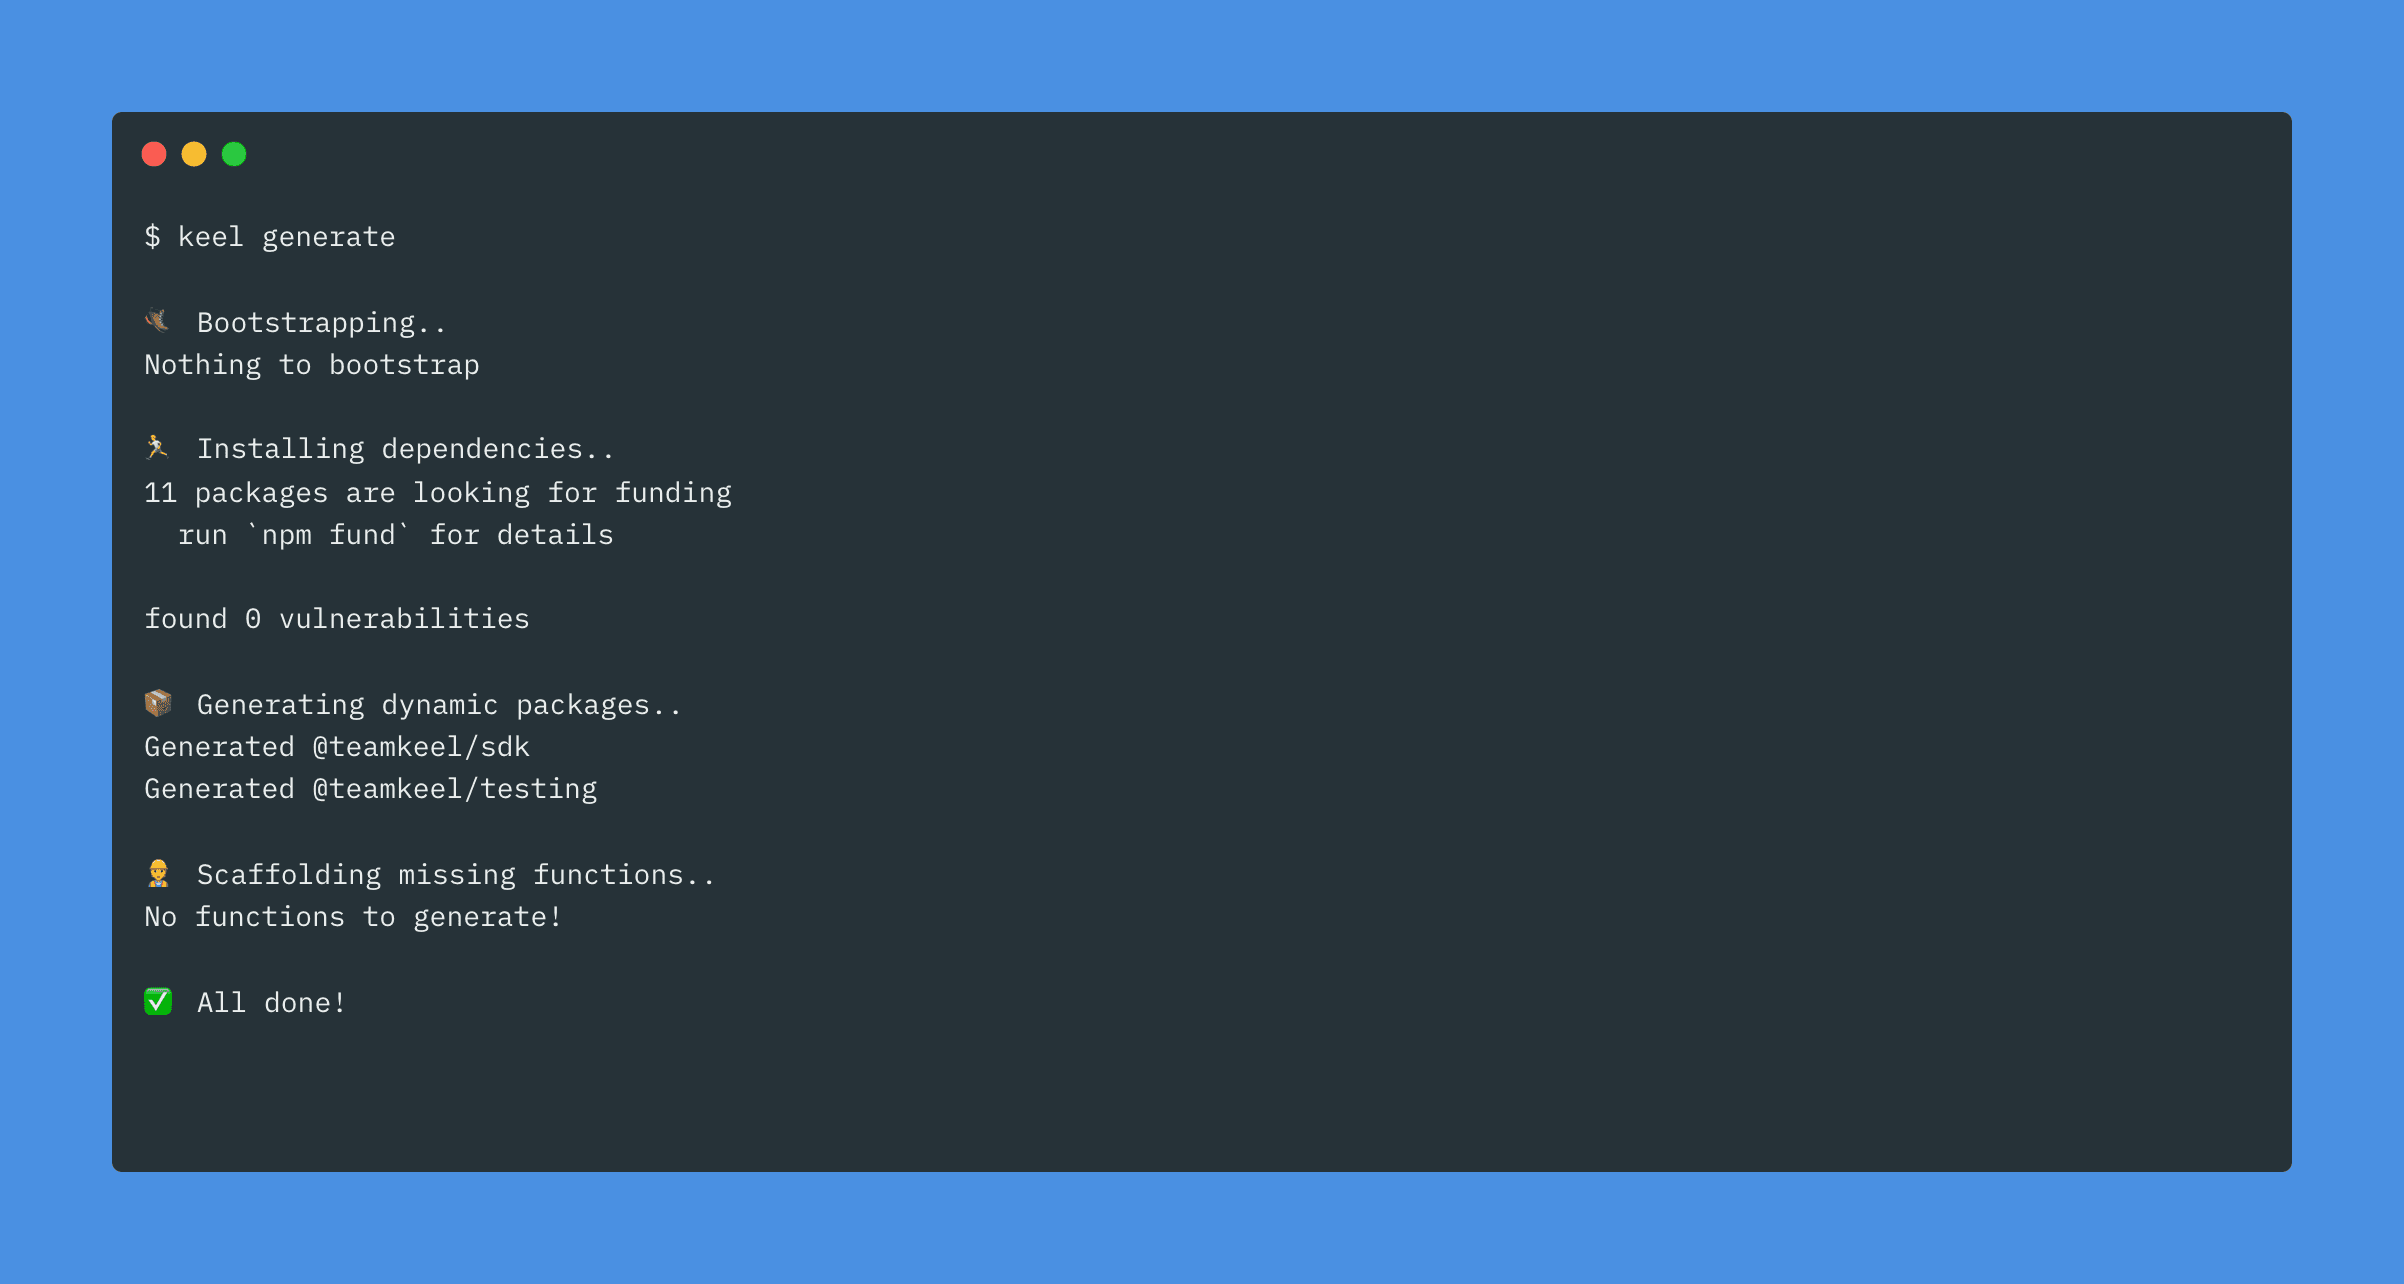
This command:
- Generates
@teamkeel/sdkwith TypeScript types from your schema - Generates
@teamkeel/testingfor writing tests - Creates stub files for any custom functions defined in your schema
When running keel run, code generation happens automatically when your schema changes. Use keel generate when you need to regenerate manually.
keel validate
Validate your Keel schema and configuration files.
keel validate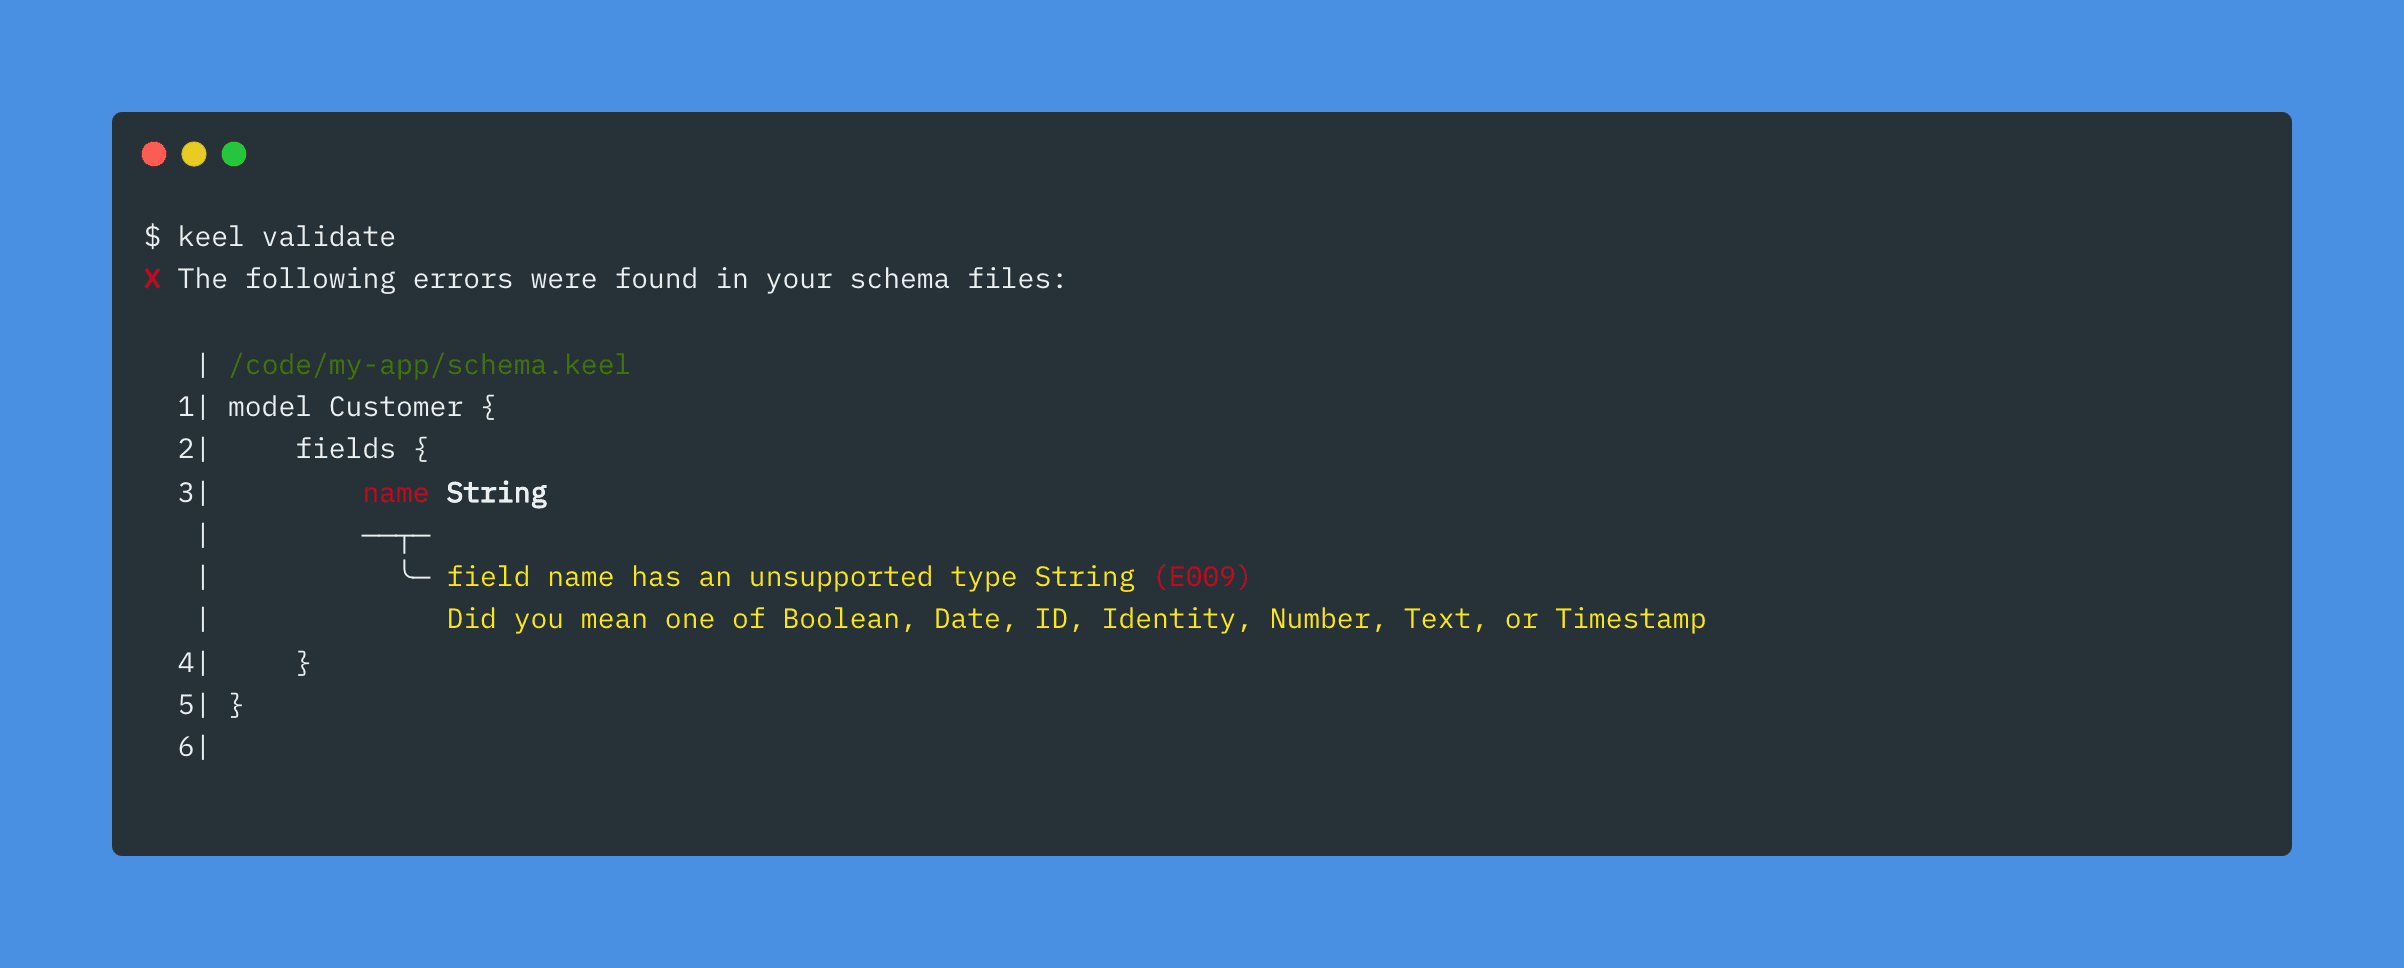
If your project is valid, the success message tells you what was checked:
✓ Schema and project configuration are valid. Tool configuration was not checked; use --tools to include it.With --tools, it reads:
✓ Schema, project configuration, and tool configuration are valid.If there are errors, they're displayed with context showing exactly where the problem is in your schema or config files.
Flags
| Flag | Description | Default |
|---|---|---|
--json | Output validation errors as JSON | false |
--tools | Also validate tool config files in the tools/ directory | false |
--schema | Base64-encoded schema (for tooling integration) | — |
--config | Base64-encoded config (for tooling integration) | — |
JSON output
For integration with editors and CI pipelines, use --json to get structured output:
keel validate --jsonThis returns a JSON object with validationErrors and configErrors arrays.
keel format
Format your .keel schema files according to Keel's standard formatting conventions.
keel formatBy default the formatted output is printed to stdout, and your files are left alone. When the project has more than one schema file, each one is preceded by a // <path> comment.
Flags
| Flag | Short | Description | Default |
|---|---|---|---|
--write | -w | Write the formatted output back to the files | false |
--check | — | Exit with a non-zero status if any file needs formatting | false |
--write and --check cannot be used together.
Examples
Format every schema file in place:
keel format --writeFail a CI job when a schema is not formatted:
keel format --check❌ schema.keel needs formatting
Error: some files need formattingA file the parser cannot read is skipped with a warning rather than rewritten, so a schema with a syntax error is never reformatted into something else.
Line length
Lines are kept within 80 characters where the schema allows it. An expression that would run past that is wrapped onto its own indented lines, breaking at operators, function arguments and list elements:
list myPosts() {
    @where(
        post.author.id == ctx.identity.id ||
            post.team.members.identity.id == ctx.identity.id ||
            post.published == true
    )
}
A long list argument is written one element per line. Expressions that already fit are left inline, so the only schemas this changes are the ones carrying long expressions — expect one large, purely cosmetic diff the first time you format such a schema.
Comments
Formatting preserves the comments in your schema, including comments at the end of a line and comments that follow the last declaration in a file. One case is still imperfect: a comment on the last entry of a multi-line action input list moves onto the closing-bracket line.
What is preserved
Formatting never changes what your schema means. Field and input types keep their [] and ? markers, and every attribute is written back out, including the attributes on a message field. Only whitespace, indentation, casing and the order of a declaration's sections change.
keel test
Run your test suite using Vitest (opens in a new tab).
keel testKeel's test runner:
- Starts a sandboxed database for test isolation
- Builds your project and starts a test server
- Runs Vitest with your test files
- Cleans up resources after tests complete
Flags
| Flag | Short | Description | Default |
|---|---|---|---|
--pattern | -p | Regex pattern to filter which tests run | (.*) |
--parallel | — | Number of isolated stacks to run test files across | 1 |
--no-logs | — | Hide application console output during the run | false |
--private-key-path | — | Path to a private key .pem file | — |
With --parallel N, Keel runs your test files across N isolated stacks, each with its own database and functions server. Files are shared across up to 8 runners and balanced by how long they took on the previous run. The default is --parallel 1, which runs serially. Pressing Ctrl-C cancels a run cleanly.
Examples
Run all tests:
keel testRun only tests matching a pattern:
keel test --pattern "createOrder"Run test files in parallel across 4 stacks:
keel test --parallel 4Learn more about writing tests in Keel in the Testing documentation.
keel client
Generate a TypeScript client SDK for your Keel API.
keel clientThis creates a fully-typed TypeScript client that you can use in frontend applications, scripts, or other services to interact with your Keel API.
The command validates your schema and your keelconfig.yaml before generating, and writes plain output rather than taking over the terminal, so it works the same in CI as it does locally. Without --watch it exits non-zero if generation fails. With --watch it reports the failure and keeps watching, so a project that starts out invalid picks up once you fix it.
Flags
| Flag | Short | Description | Default |
|---|---|---|---|
--api | -a | Name of the API to generate a client for | — |
--output | -o | Directory to output the generated client | . |
--package | — | Generate as a package (with package.json) instead of a single file | false |
--watch | — | Watch for schema changes and regenerate | false |
Examples
Generate a client for your default API:
keel clientGenerate a client for a specific API into a lib directory:
keel client --api web --output ./libGenerate as a standalone package:
keel client --package --output ./packages/api-clientWatch mode for development:
keel client --watch --output ./src/libSingle file vs package
By default, keel client generates a single TypeScript file. This works well for most use cases.
With --package, it generates a complete npm package structure with its own package.json. This is useful when you want to:
- Share the client across multiple projects
- Publish the client to a private npm registry
- Keep the client in a monorepo package
keel db
Manage your local development database. These subcommands connect to a running database.
See Seeding data for the full seeding workflow.
keel db seed
Apply the SQL files in your project's seed/ directory to the development database.
keel db seedSeeding is non-destructive by default: existing rows are left untouched, so the command is safe to run again.
| Flag | Description | Default |
|---|---|---|
--overwrite | Update existing rows to the latest seed values | false |
--reset | Rebuild the database from scratch before seeding (deletes all data) | false |
--scenario | Apply a specific scenario subdirectory (e.g., demo) | - |
--database-url | PostgreSQL connection string to use instead of Docker | - |
Files run in alphabetical order, so prefix them with numbers to control the order:
my-keel-app/
├── seed/
│   ├── 001_categories.sql
│   ├── 002_products.sql
│   └── 003_users.sql
├── schema.keel
└── keelconfig.yaml
keel db snapshot
Capture the current state of the database into a reusable seed file.
keel db snapshotThis writes to seed/snapshot/snapshot.sql. It is a read-only capture: it does not reset or re-seed the database. Pass a name to capture into a named scenario:
keel db snapshot demoThat writes to seed/demo/snapshot.sql, which you can recreate later with keel db seed --scenario demo.
keel db reset
Drop and recreate your development database, leaving it empty.
keel db resetThe next keel run re-applies your migrations from scratch and seeds the fresh database.
keel db reset permanently deletes all data in your local database. This cannot be undone.
keel seed
Author seed data offline. These subcommands do not need a running database. To apply seed data to a database, use keel db seed.
keel seedkeel secrets
Manage secrets for local development and testing.
keel secretsSecrets are stored in your CLI config at ~/.keel/config.yaml and are available to your Keel app during local development.
Subcommands
secrets list
List all secrets for an environment:
keel secrets list
keel secrets list --env test
secrets set
Set a secret value:
keel secrets set MY_API_KEY "sk-secret-value"
keel secrets set STRIPE_KEY "sk_test_..." --env test
secrets remove
Remove a secret:
keel secrets remove MY_API_KEY
keel secrets remove STRIPE_KEY --env test
Flags
| Flag | Short | Description | Default |
|---|---|---|---|
--env | -e | Environment (development or test) | development |
The keel secrets command manages secrets for local development only. For deployed environments, use the Keel Console (opens in a new tab) for Keel-hosted projects.
Troubleshooting
Docker not running
If you see errors about Docker, ensure Docker Desktop is running:
docker psPort already in use
If port 8000 is already in use, specify a different port:
keel run --port 3001Package manager issues
The CLI auto-detects your package manager from lockfiles. If you're having issues, ensure you have either package-lock.json (npm) or pnpm-lock.yaml (pnpm) in your project or a parent directory.